1.Introduction: The Quest for a Versatile Motion Module
In this first Design Share for the General Motion Framework (GMF), I’d like to walk you through our journey of creating a bespoke 2-speed sequential dog box.
Our goal was to bridge the gap between high-speed cruising and high-torque maneuvering without relying on the friction-heavy clutches common in hobbyist builds. Instead, we’ve replicated professional motorsport mechanics through a “Standard Parts + Creative Design” approach.
This “1st Generation” prototype successfully combines standard metal gears with custom 3D-printed components, serving as a critical proof-of-concept that brings crisp, mechanical shifting to a compact DIY scale. It marks the start of our evolution from 3D printing toward industrial-grade CNC, and I’m excited to break down the logic behind it.
2. Components & Working Principle of a Sequential Gearbox
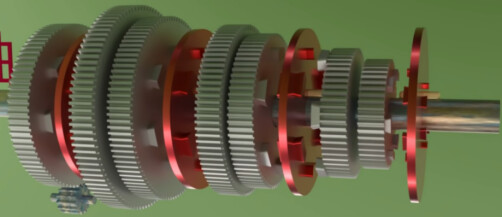
The core philosophy of a sequential gearbox is “One-way, clutchless shifting.” It acts as a power hub, and its logic can be broken down into these key components:
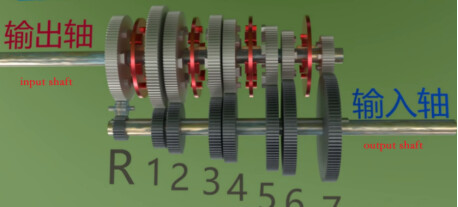
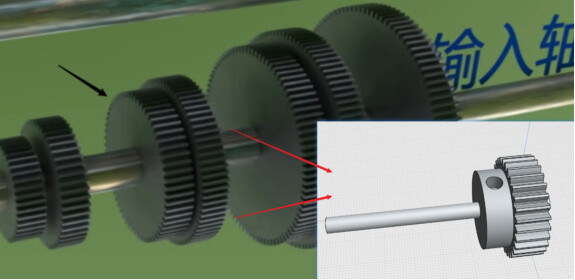
Fixed Gear: Mounted on the input shaft. It is locked to the shaft, meaning it rotates whenever the motor turns to provide the source of power.
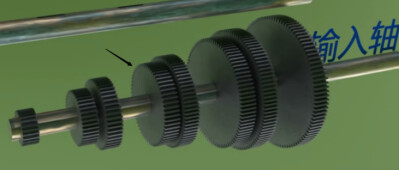
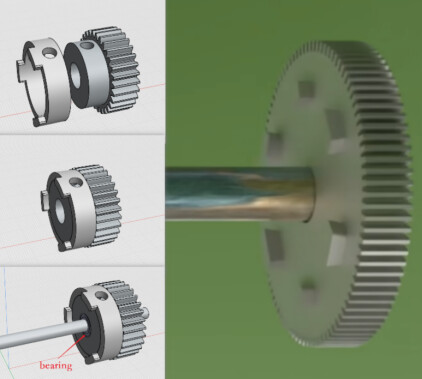
Free Gear: Mounted on the output shaft. While it sits on the shaft, it spins freely and does not drive the shaft initially. Its side features heavy-duty protrusions called “Dog Teeth.”
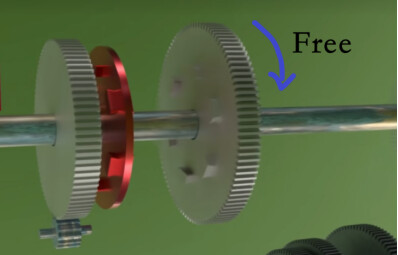
Dog Clutch & Spline: This is the most critical part. The Dog Clutch is mounted on the output shaft via a Spline (a longitudinal sliding rail).
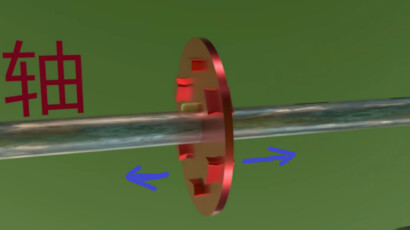
Principle: The Dog Clutch rotates with the shaft but can slide axially. When it slides toward a Free Gear, their “dogs” lock together, transferring power from the gear to the output shaft.
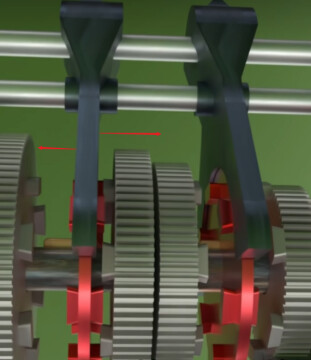
Shift Fork: Acts like a mechanical hand that pushes the Dog Clutch left or right to select the desired gear.
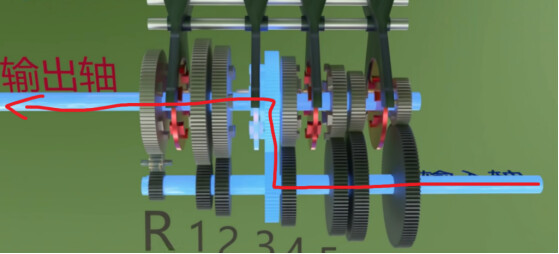
Simplified Shifting Principle:
The Input Shaft drives the Fixed Gear → the Fixed Gear drives the Free Gear on the Output Shaft (idling at this stage) → the Shift Fork pushes the Dog Clutch → the “dogs” on the Dog Clutch engage and lock with the Free Gear → Power is finally transmitted to the Output Shaft.
3. DIY Design & Creative Part Substitutions
Technical Specifications: Gear Ratios & Balancing For this 2-speed setup, I utilized two sets of Module 1 gears with 50T (teeth) and 26T configurations.
Gear Ratio Analysis: These specific tooth counts were chosen to create a significant torque/speed difference between the two gears while maintaining a compact form factor.
The Perfect Balance: In a DIY dog box, the gap between gear sizes is crucial. I found that this 50T/26T combination offers the ideal balance between shifting smoothness and effective gear reduction. If the ratio jump is too large, the “dogs” struggle to synchronize during the collision; if it’s too small, the 2-speed effect isn’t noticeable. This setup ensures a crisp, reliable shift every time.
In a DIY environment, machining complex industrial parts like spline shafts or high-precision dog teeth is difficult. Thus, I used a “Standard Parts + Creative Design” approach:
①Component Substitutions
Fixed Gear: I used standard metal gears with boss and set-screws. The set-screw locks onto a flat spot on the shaft, replacing complex industrial interference fits.
Free Gear: I used a standard gear but added a 3D-printed “Dog Ring” to its side. This maintains the strength of metal teeth while enabling the complex dog geometry.
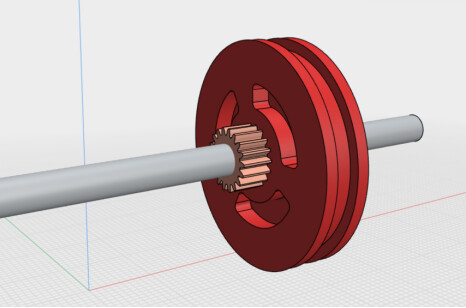
Dog Clutch (Sliding Sleeve): My core innovation. I printed a red sleeve with arc-shaped grooves on the faces to ensure smooth engagement with the dogs even during rotation.
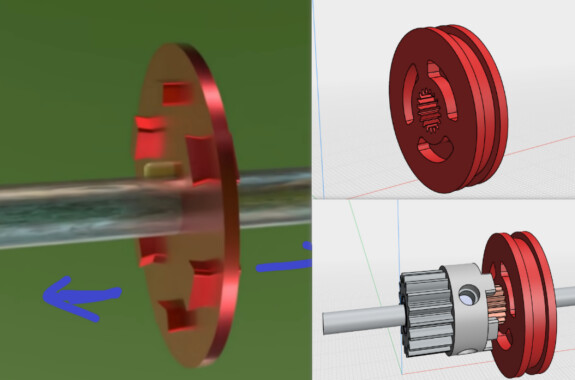
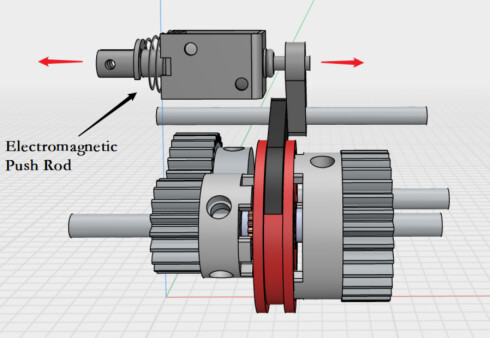
The “Gear-as-Spline” Innovation : Instead of machining an external spline shaft, I fixed a small metal gear to the output shaft to act as the “External Spline.” I then designed the Dog Clutch with a matching internal gear profile. This allows it to slide smoothly while transmitting high torque
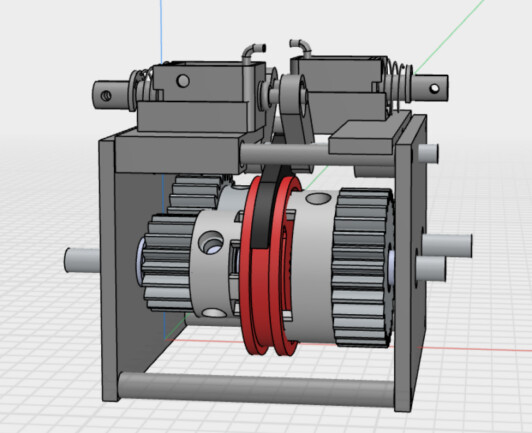
②Dual-Solenoid Actuation System
To control the shift fork, I introduced Electromagnetic Solenoids (Push-Rods)
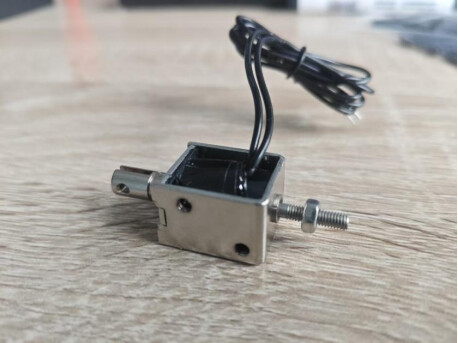
The Problem: Hobbyist solenoids usually have a strong “push” force but a very weak spring-based “return” force.
The Solution: I used a Symmetrical Dual-Solenoid Setup. For 1st gear, the left solenoid pushes the fork right; for 2nd gear, the right solenoid pushes the fork left. Every shift is driven by an active “Push” force. Combined with the arc-shaped grooves on the Dog Clutch, this ensures a firm, reliable “click” into place every time.
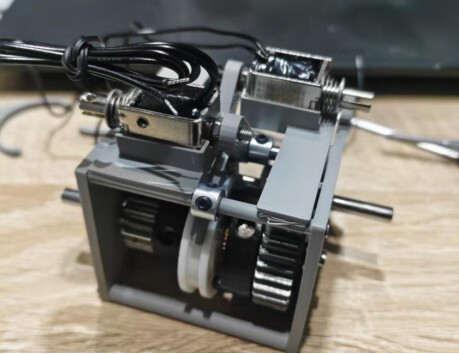
4. DIY Model Showcase & Summary
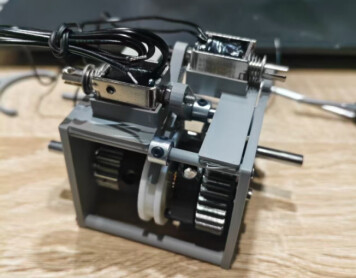
The final “1st-gen” prototype demonstrates a very crisp and mechanical shifting experience

Future Improvements & Current Challenges: While the prototype works, there are several areas for optimization:
Wear and Tear: The 3D-printed dog clutch is the primary failure point under high stress.
System Complexity: The dual-solenoid setup, while reliable, increases the overall footprint and wiring complexity.
Mechanical Slip: The boss gears fixed with set-screws face a potential risk of slipping on the shaft under extreme torque.
Final Thoughts: From POC to Performance
This 1st-Gen prototype successfully translates complex industrial kinetics into a functional DIY unit. It’s more than just a gearbox; it’s a proof-of-concept for solving manufacturing constraints with 3D printing and creative geometry. However, we’re just scratching the surface.
To solve the durability and slip issues mentioned above, we have already pushed the design through 2nd and 3rd iterations, pivoting toward CNC-machined POM (Acetal) and metal hybrid structures to maximize torque density and precision. If you’re curious about how these engineering puzzles were solved, stay tuned for the next update!
Design is always better when it’s collaborative—if you’re hacking together your own interesting transmissions or motion modules, please share them in the comments! Let’s swap some “war stories” and level up together.![]()
![]()